Agrotunnel cleaning procedure:FAST
Safety Training Requirements
- Dr. Pearce Safety Lab Tour
- Worker Health & Safety Awareness
- WHMIS 2015 - Workplace Hazardous Materials Information System
- Laboratory Safety & Hazardous Waste Management
Safety Issues With Method
Possibility of slips, trips and falls
- Watch the wet floors while walking to avoid tripping and falling hazard.
- Make sure plugs for growing lighting are off for the vertical wall under cleaning.
- When working with nutrients or any other chemicals, including vinegar, please ensure that a microfiber cloth is placed underneath while transferring the substances between containers, or use a black cart. Nutrient spillage can cause white spots on the floor, which are difficult to clean.
Personal protective equipment
PPE is to keep YOU safe so that you can keep doing what you want to do.
- Safety glasses – always required
- Lab coat
- Boot covers
- gloves
SDS and other
We are not using any harsh chemicals for cleaning for Agrotunnel.
- Appropriate SDS sheets should be viewed online.
- We are using absolutely natural, safe and biodegradable cleaner.
Equipment Name
- Operating at ICFAR
- Agrotunnel
- Vertical grow walls
- Grow bins
- Grow lights
Light and Temperature Tolerances
- Growing space can not tolerate any external or secondary lights which can interfere with their growing needs
- Temperature mostly should remain constant to avoid conditions like stress and dehydration in plants
Operational & Procedural Protocols
General Safety Rules:
- All first-time users of the Agrivoltaic Agrotunnel facility (faculty, staff, students, and volunteers) are required to schedule an orientation session with the Agrivoltaic Agrotunnel staff. This session will introduce the user to the resources and policies of the facility, good housekeeping rules, disease and pest avoidance, and worker and pesticide safety.
- Guests MUST comply with all posted facility rules
- The doors to the facility must be closed at all times and should be kept locked after hours
- No food, drink, tobacco, alcohol and marijuna products permitted in the facility
- No animals are permitted
- Repairs should occur while research is inactive, if possible. If there are ongoing studies with no shut-down periods, repair personnel must be made aware of the hazards present
- Clothing shall include long pants and closed-toed, slip-resistant shoes
- Hand tools with loose heads or split/defective handles must be repaired or replaced
- All researcher is responsible for planting and the maintenance of their plants, including staking, training, transplanting, and harvesting.
1. How to Enter the Agrotunnel
To safely enter the Agrivoltaic Agrotunnel, your visit must communicate with Nima Asgari or the Biosecurity Lead, Chenille Humes, before arrival.
After receiving permission to enter the Agrotunnel, follow these steps:
- Enter from the front door through the plastic screen and step directly into the footbath at the front door. Wait for five (5) seconds then,
- Step directly onto the foot mat in front the footbath.
- Head to the handwash station and complete the proper handwash protocol posted.
- Go to the clothes rack and put on a clean lab coat.
- Cover your hair with a hairnet, and if necessary, use a beard net to cover your beard.
- Finally, sign the visiting record.
If you are unable to step directly into the footbath with your shoes, follow these steps:
- Before entering through the front screen door, you will be provided with a shoe covering. Use it to completely cover your shoe.
- Then, step directly into the footbath at the front door. Wait for five (5) seconds then
- Step directly onto the foot mat in front the footbath.
- Head to the handwash station and complete the proper handwash protocol posted.
- Go to the clothes rack and put on a clean lab coat.
- Cover your hair with a hairnet, and if necessary, use a beard net to cover your beard.
- Finally, sign the visitors record.
See demonstration video below:
2. Visitor's Record and staff attendance log
- All visitors to the Agrivoltaic Agrotunnel must sign the log and answer standard questions before being allowed to enter the grow room.
- Visitors must abide by the posted safety and health signage.
- All staff must sign the attendance log and indicate their purpose and/or tasks undertaken at the Agrivoltaic Agrotunnel each day.
3. Entering the Grow room
All staff and visitors must wear a lab coat, gloves, hair nets and where necessary, a beard net and shoe covering before entering the grow room. to enter the grow room, all personnel must step directly into the second footbath at the entrance of the grow room then onto the mat before proceeding.
NB: UNAUTHORIZED PERSONS SHOULD NOT BE ALLOWED TO TOUCH OR INTERACT WITH THE PLANTS ON THE GROW WALLS, WITHOUT SUPERVISION.
NB: ALL LAB COATS MUST BE WASHED WEEKLY.
4. Plant Material/Growth Media Protocol
- Do not bring personal plants in the Agrivoltaic grotunnel
- Soil and plant material are to be disposed of at designated locations.
- The Biosecurity Lead must be notified BEFORE any plant material is brought into the Agrotunnel. Plants brought from field plots can introduce pathogens and insect pests into the facility.
- Before the start of any experiment, install/replace the yellow sticky traps on the grow wall.
- Researchers must include a scouting regime into their experiment and communicate same to the Biosecurity Lead before the start of their experiments.
- All insect and disease problems must be reported IMMEDIATELY to the Biosecurity Lead.
- All growing media (i.e. coco coir, biochar, peat, perlite, sponge) and plant materials (i.e seeds, seedlings and/or cuttings) must be purchased from certified, reputable companies.
- All plant materials and growing media must be free from diseases and insect pests.
- NO plant material or growing media that display signs of a disease, pathogen or insect infestation must be used, be allowed to enter the Agrivoltaic Agrotunnel nor be transplanted in the grow walls. They must be disposed of IMMEDIATELY and the sanitation/cleaning protocols must be followed.
- All experiments must be properly labelled and display the researchers name, plant name and source and length of experiment.
- For research integrity, DO NOT use spilled potting mix or soil that has been on the floor. Once spilled it must be discarded.
- Avoid placing plant material, pots or tools on the floor. The floor is not a desirable work or growing surface.
- Wash hands and use a glove before/after touching any plant material and growing media
5. Personal Protective Equipment (PPE)
All researchers and staff are required to wear anti-slip shoes inside the growth facilities. Eye and ear protection, masks, and gloves must be worn as needed.
The following are some examples of situations where PPE is required:
- Mask and gloves should be worn when working with dry soil or soilless potting mix.
- Gloves must be worn when working with fertilizer solutions.
- Goggles must be worn when using the powerwash.
- Goggles and gloves must be worn when working with liquid nitrogen.
- High intensity light eye protection must be worn when entering a running high light intensity growth room.
- Noise blockers (e.g. earplugs) must be worn when inside a growth room.
6. Pesticides
6. Pesticides
Pesticide use on plants require consent from all users that maybe affected. Researchers should consider alternative means of controlling pest insects, including biocontrol, non-pesticide treatments (e.g. soap in water), and discontinuing experiments. Pesticides should be used as a last or emergency resort to save critically important experiments. At least one member of the staff should be properly trained and certified to mix and apply pesticides. Individuals performing the pesticide application must be licensed and trained to do so. Requests to use pesticides in the Agrivoltaics Agrotunnel must be sent to the Biosecurity Lead, Chenille Humes at chumes2@uwo.ca and to Dr. Pearce.
Pest monitoring products (i.e. yellow sticky cards) can be used in the Agrotunnel. Biological pest control may be used as part of the Integrated Pest Management program.
7. Cleaning/Maintenance Protocol
NB: Cleaning is the responsibility of all users. Researchers should sweep soil from the floors and counters that originates from their work, and remove pots and other supplies or equipment from common-use areas. Used soil and pots should be moved by researchers to appropriate compost or garbage bins.
- The Measuring Equipment:
To ensure both safety and accuracy in future measurements, it is imperative to thoroughly sanitize the measuring equipment after each use. In order to do so, triple rinse the container with water and discard into an empty bucket/container. Wash the measuring cups and bottles with soap and water and rinse. Discard the contents of the bucket in the designated location for chemical discard.
All tables and surfaces must be sanitized with commercial grade bleach after each use, then sanitized at the end of each week with OxiDate. See SDS for mix instructions.
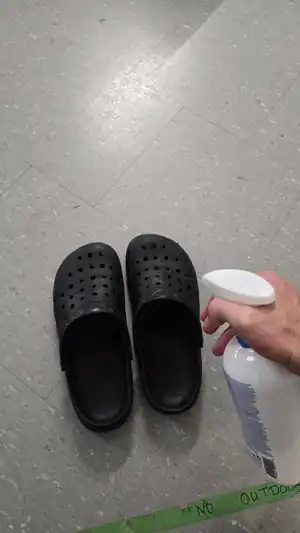
- Sanitization of slippers
Place a pair of slippers gently on the ground. Spray and sanitize the top surface of the slippers. Next, thoroughly wipe the slippers with paper towels. Examine the slippers for any potential dirty spots. If the slippers are properly cleaned, place them back on the clean shelf.
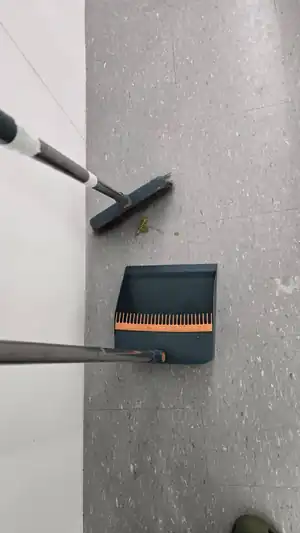
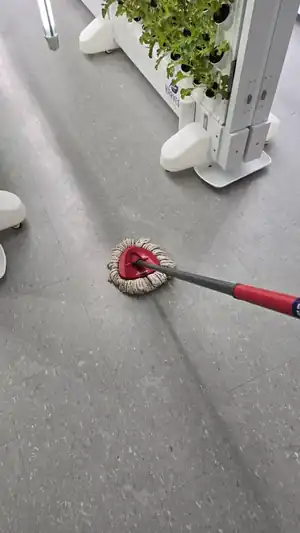
- Floor Cleaning
Floors should be cleaned after each operation or as needed. Floors must be mopped and thoroughly cleaned every Friday or as needed: Conduct a comprehensive inspection of the entire Agrotunnel to identify all areas that require cleaning. Begin by sweeping all sections of the lab where dirt or other debris is present on the floor. Ensure that the entire lab is meticulously swept and free from dirt. Subsequently, mop the entire floor of the lab thoroughly to achieve a high standard of cleanliness and maintain proper hygiene.
- The grow cups
Researchers are responsible for cleaning and sanitizing all the cups that were used in their respective experiments. Cups must be free of plant residue and debris and rinse thoroughly once before being soaked in OxiDate solution for at least 2hours. After cups complete soaking, remove them and place to air dry and securely store the dry cups in designated containers.
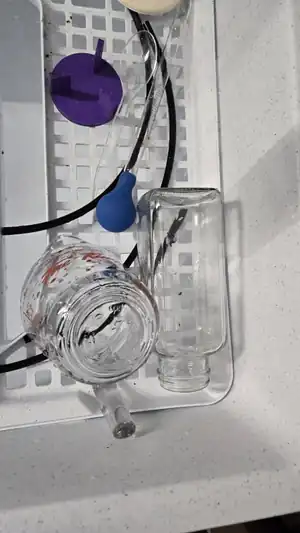
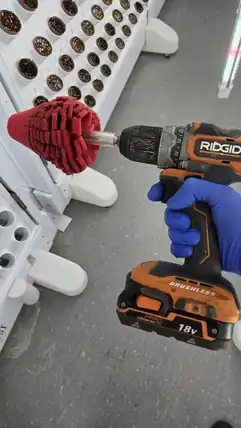
- The empty ports on the grow walls
Inspection: Carefully examine all empty ports on the growing wall for any signs of dirt or contamination. Complete the cleaning/maintenance checklist daily and document all tasks completed.
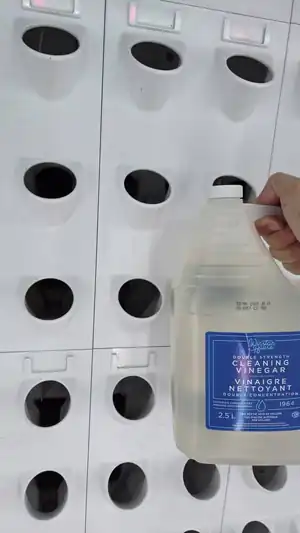
- If a dirty port is identified, spray it with a solution consisting of equal parts vinegar and water.
- Wipe the sprayed port with a clean towel until all dirt and contaminants are removed.
- You can also use drill and brush attachment to quickly and easily clean the ports. Please take a look at the pictures and video.
- Wall Sanitation
- All grow walls MUST be sanitized with OxiDate AFTER EACH grow cycle.
- Remove all the caps from the reservoirs of each wall and examine the cleanliness of the reservoirs. Clean any reservoirs that are dirty.
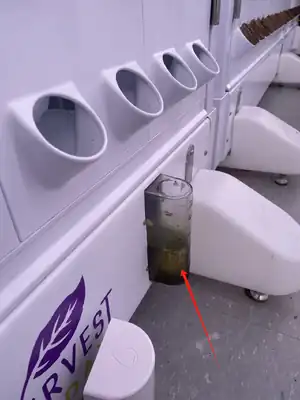
Important Note: All the holes beneath the water channel at the top of the wall must be cleaned from algae or any other things clogging the holes.
To maintain optimal cleanliness, follow these steps to properly clean the reservoir:
- All grow walls MUST be sanitized with OxiDate AFTER EACH grow cycle:
- Use a vacuum to thoroughly clean the reservoir. Open the grow wall from the center, and carefully insert the vacuum head to the bottom of the wall under the water. Ensure to reach all corners to remove any dirt, soil, and coco coir particles.
- Mix 3ml/L OxiDate:water solution to fill the water reservoir on each grow wall.
- Then run run the irrigation to pump the OxiDate solution throughout the grow wall. After, remove the OxiDate solution from the reservoir with the vacuum and dispose at the chemical disposal site.
By following these steps, you can ensure a clean and well-maintained reservoir, promoting a healthier growing environment.
- The Footbaths
Each footbath must be cleaned and replenished every TWO (2) days:
- use the wet vacuum to remove all water solution from the footbath.
- If the footbath still has residues or debris after removing the water solution, it must be washed and be clean before moving on to the next step.
- Into the clean footbath, fill with water to the half-way line and add 5ml of commercial grade Bleach.
- ensure the mat beside the footbath is also vacuumed and cleaned. If the mat is saturated, replace with a dry mat
Floor Mats
- Preparation: Ensure that the vacuum cleaner is in good working condition, and the filter and dust bag are empty. Remove any large debris or items from the floor mat manually to prevent clogging the vacuum cleaner.
- Initial Inspection: Visually inspect the floor mat for any stains or spills that may require pre-treatment.
- Vacuuming: Plug the vacuum cleaner into a suitable power outlet. Start at one corner of the floor mat and slowly move the vacuum cleaner in straight lines, overlapping each pass to ensure thorough coverage. If the vacuum has adjustable settings, set it to the appropriate level for the type of floor mat material.
- Final Inspection: Conduct a final visual inspection to ensure the floor mat is clean and free of debris. If necessary, repeat the vacuuming process on any missed areas.
- Post-Cleaning Procedure: Turn off and unplug the vacuum cleaner. Empty the vacuum cleaner's dust bag or container and clean the filter. Store the vacuum cleaner and any cleaning supplies in their designated storage areas. Dispose of any waste materials according to the lab’s waste disposal guidelines.
By following this procedure, the floor mat in the Agrotunnel will be effectively cleaned, maintaining a safe and hygienic environment.
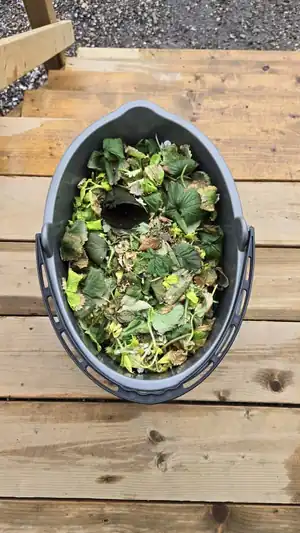
8. Disposing of compost
Collect the lab's compost waste daily in a designated bucket. It is essential to dispose of the compost at the approved location each day. The compost waste from the lab can be used as biomass for future fermentation and digestion processes.
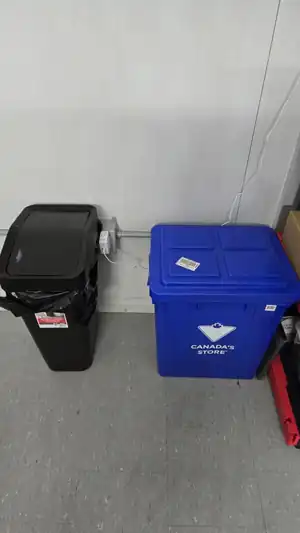
9. Disposal of Waste and Recycling Bins
Procedure for Waste Disposal and Recycling Bin Maintenance
- Daily Monitoring: Inspect waste disposal and recycling bins daily to verify they are positioned in the designated locations.
- Replacement and Hygiene: Replace the waste disposal bags in the bins once every day to maintain optimal hygiene standards.
- Positioning: Ensure the bins are neatly placed in the designated corner.
Shutdown
After thoroughly cleaning the interior and exterior, reposition the growth walls and lighting fixtures to their correct locations.
| Authors | Chumes2 |
|---|---|
| License | CC-BY-SA-4.0 |
| Organizations | Free Appropriate Sustainable Technology, Western University |
| Cite as | Chumes2 (2024–2025). "Agrotunnel cleaning procedure:FAST". Appropedia. Retrieved November 28, 2025. |